Achieving Pixel-Perfect 3D Rendering in Unity

Do you remember the pythagorean theorem from high school? No worries if you don't... We also did not think we'd ever use THAT again. Let's dive in!
Why Are We Talking About High School Trigonometry?
As you may have read in our last update, our game is actually in 3D. Briefly put, we lock the camera's movement along the Y axis, tricking players into viewing only a 2D plane of the 3D world. If you want to know more about how we implemented this, check it out here.
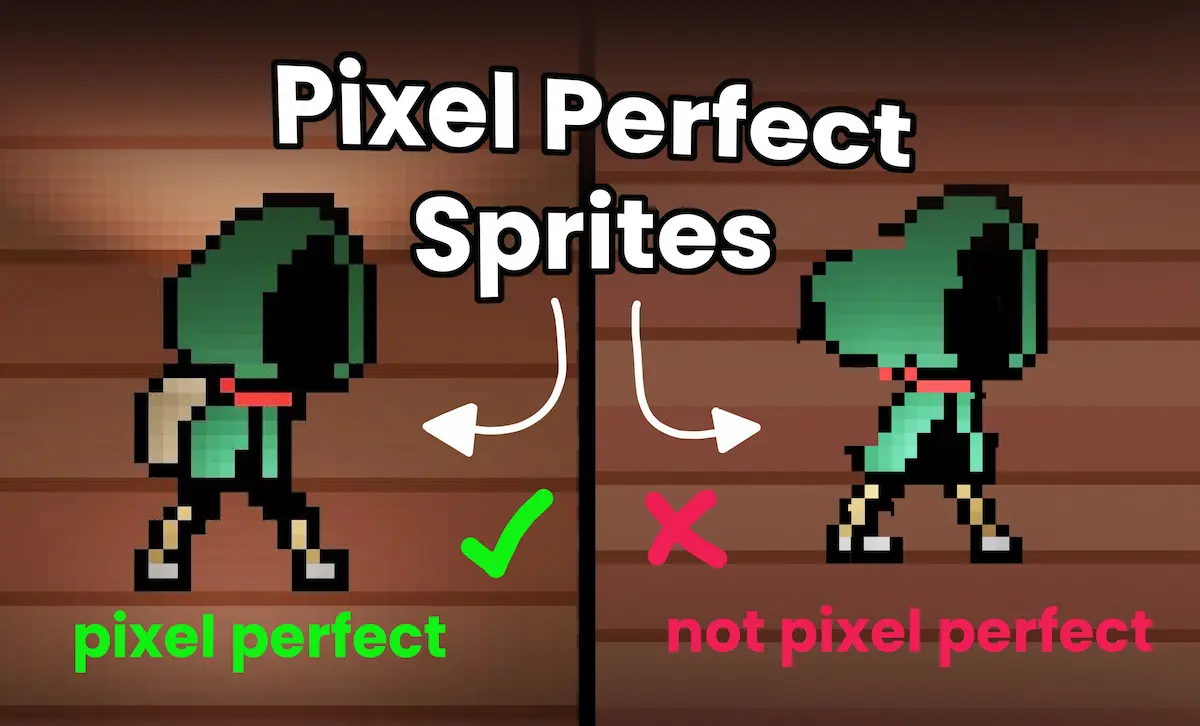
However, this method led to serious issues with our pixel art. This update will explain our solution to render in pixel-perfect while maintaining the dynamic shadows and lighting that 3D offers.
The Problem
![]()
First, our switch to 3D led to a "giggly" effect on our assets when moving around a level and second, our assets were looking stretched and wonky. Therefore, we set out to figure out why.
The Cause
Simply put, Unity's camera moves along a grid. If your assets are not perfectly aligned with this grid, you will get rendering issues like the “giggly” effect. In our research to understand this phenomenon, we found a Stack Overflow article with visual aids to illustrate what was happening to the pixels. At this point, we knew that we would need to refactor our assets to align with our grid. More on this later.
![]()
Furthermore, we found out that the stretching of the pixels was caused by the 45° angle of our camera. This viewing angle distorted the perfect squares of the pixels into triangular shapes. Therefore, achieving pixel-perfect for our camera would not be as simple as snapping our assets onto a grid. This is where trigonometry will come to our aid.
![]()
The Pythagorean theorem told us that the camera should compensate for its viewing angle so that the pixels appeared perfectly square. In math terms, we needed to solve for the hypotenuse. This will be our magic number.
![]()
The Fix
You might be asking yourself, "these fine folks are not the first ones to make a pixel-art game; I'm sure Unity has an easy solution for this..." You are not wrong. Unity has a pixel-perfect camera component. Huzzah! ╰(°▽°)╯
![]()
However, this component is only compatible with Unity’s 2D renderer, and as you know, our game is using a 3D renderer. Frankly, we did not know where to go from here. Therefore, we sought help from fellow indie game developer Elliot Colp (@FinalNanner) to find a solution. Please go check out his incredible work on Tumble Rush.
With his help, we determined that our pixel grid was actually 1/32 by 1/32. This is entirely project-dependent and is determined by the pixel resolution of your assets. As you may have guessed, our pixel resolution is 32 pixels by 32 pixels.
If we were viewing the level at a perfect 90° angle, we would simply have to set our camera's snapping for the X and Z axis to 1/32 increments (0.03125). Remember that our Y axis is locked because we are only displaying a 2D plane of our game. However, our grid has to compensate for the camera angle by solving for the hypotenuse, which we will call z. Z is the vertical axis in the 2D render of our game, as shown below.
![]()
Based on the formula, the solution to find our magic number is:
![]()
In this case, our magic number is 0.04419411. We set the camera's snapping grid to x = 0.03125 and z = 0.04419411. This means that the camera moves by increments of 0.03125 pixels on the x-axis and 0.04419411 pixels on the z-axis. Again, this is due to the camera being at a 45° angle and the resulting distortion of the pixels on the z-axis.
![]()
The Result
After all this work involving theorems and hippos 🦛, we finally achieved pixel-perfect!