How We Add Depth to Our Game with Particle Effects
We are starting the new year with a short tutorial from our creative director and art director, Titus Lo, about how he uses particle effects in Project Ghost.
The Problem
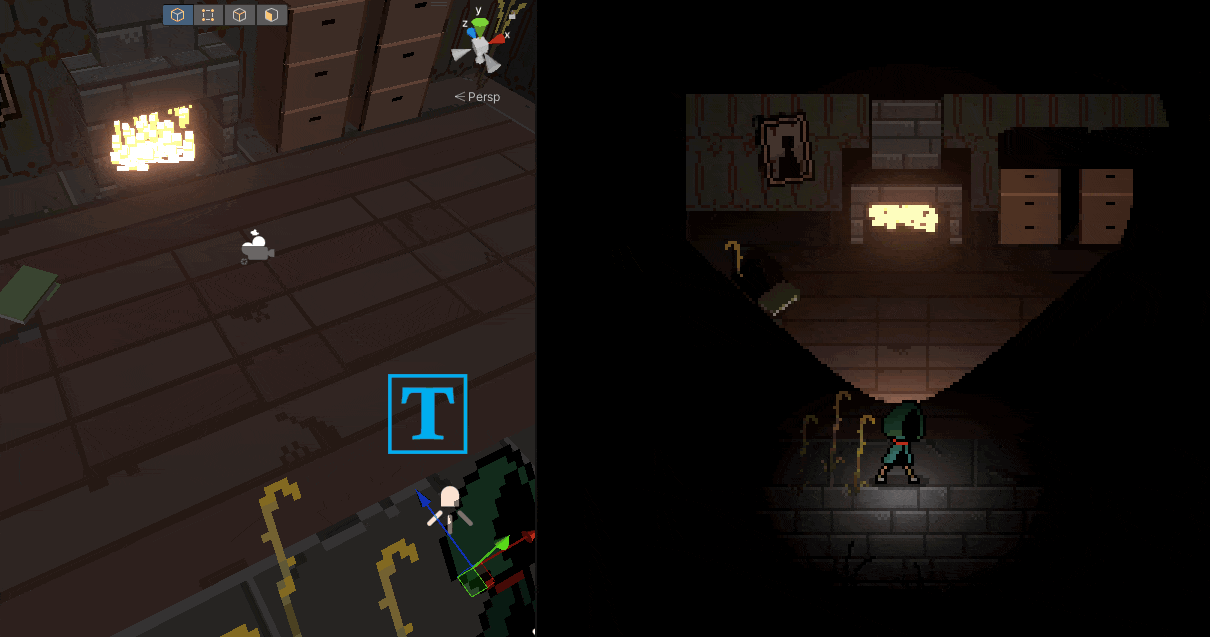
Our game is set in a dark dungeon, and light sources provide safety to the player. Although we found that the candle sprites and the lighting looked good already, we felt that it was still missing depth for the player to feel the security the light provides. See the picture below before adding particle effects.
To give our level more life, we opted to use the Unity particle system to add movement to the flames, which resulted in a more inviting atmosphere for the players.
The Solution
To implement particle effects that emit from an object, you must add the Particle system as a component on the source object. In this case, the source object is Candle_lit, as shown in the image below.
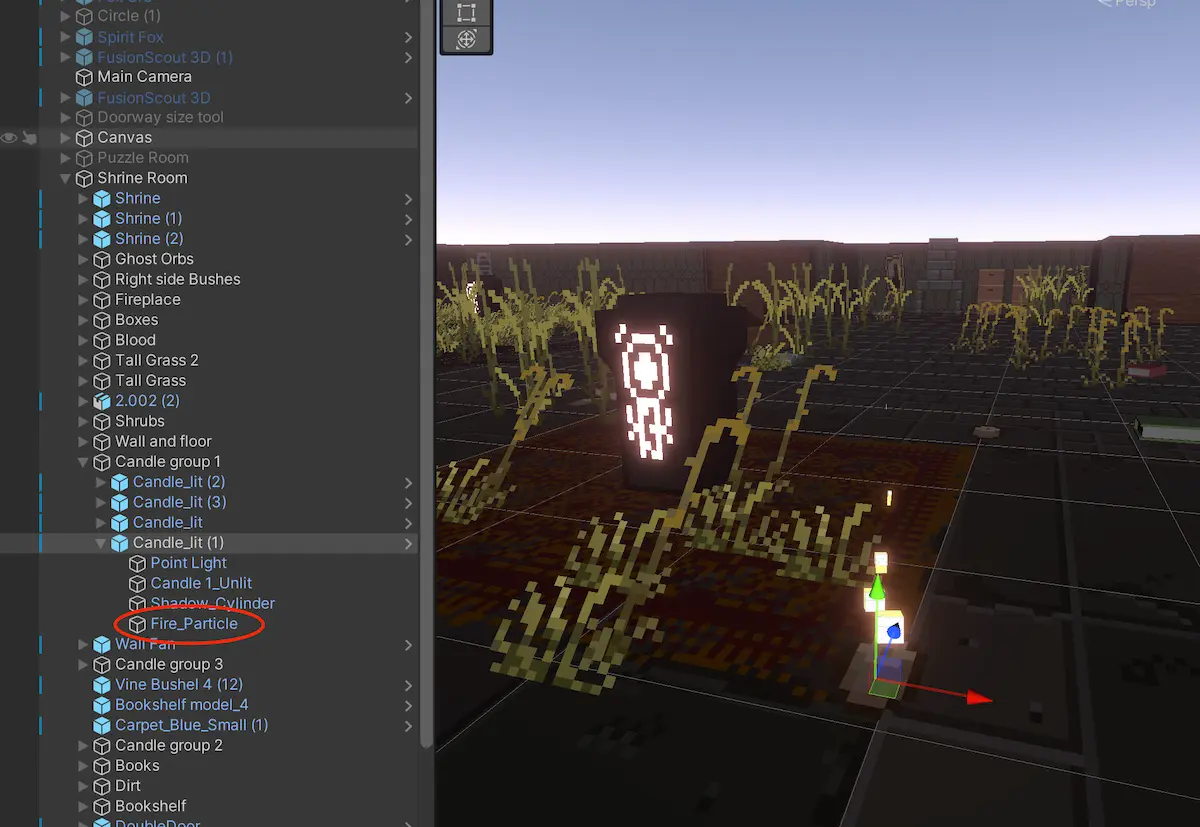
When you click on the particle system we named Fire_particle, you will have access to many settings and parameters. As you play with those settings to create your effect, you can save a snapshot as a prefab and reuse it easily on all your fire sources.
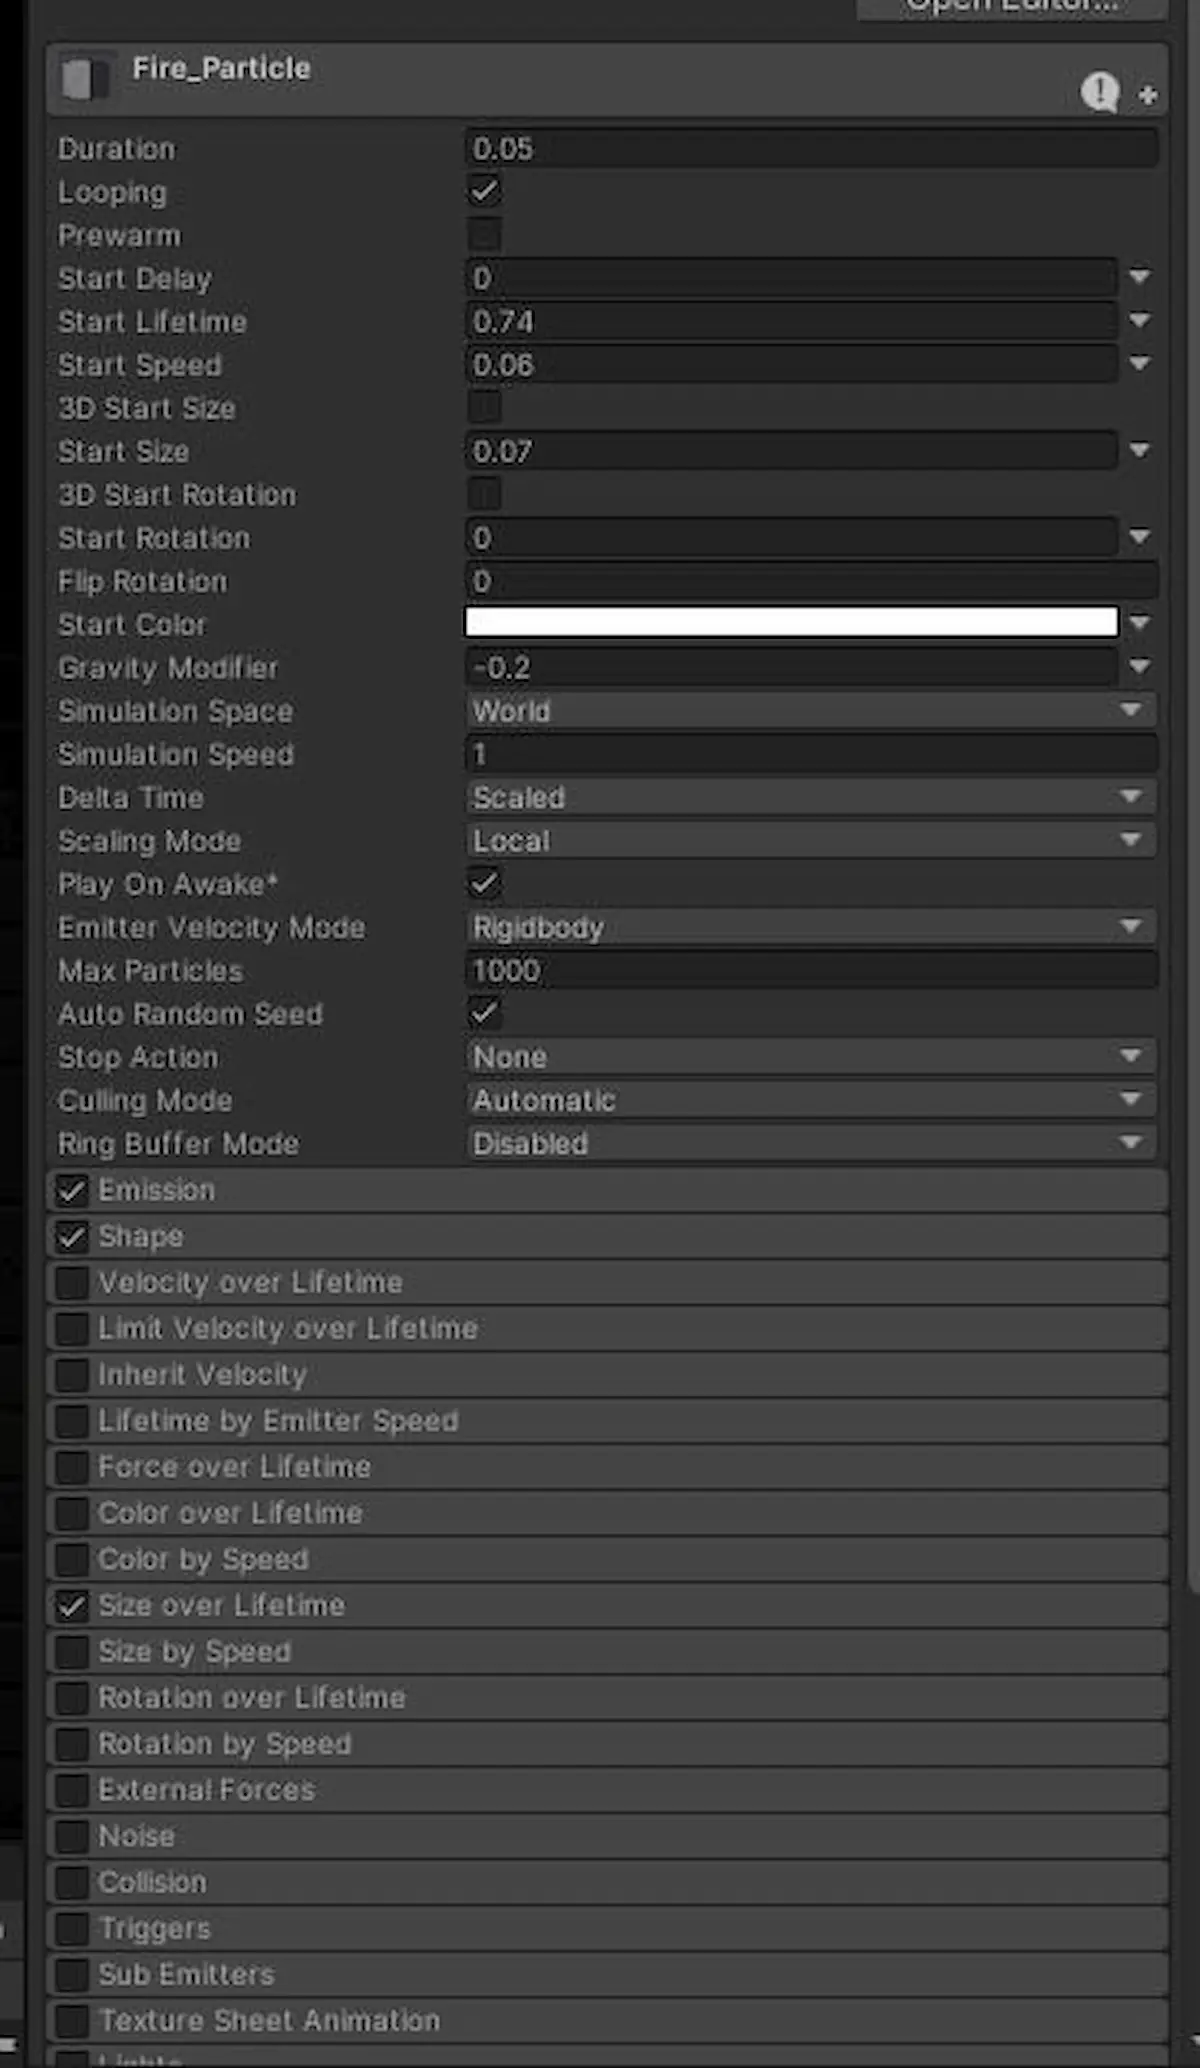
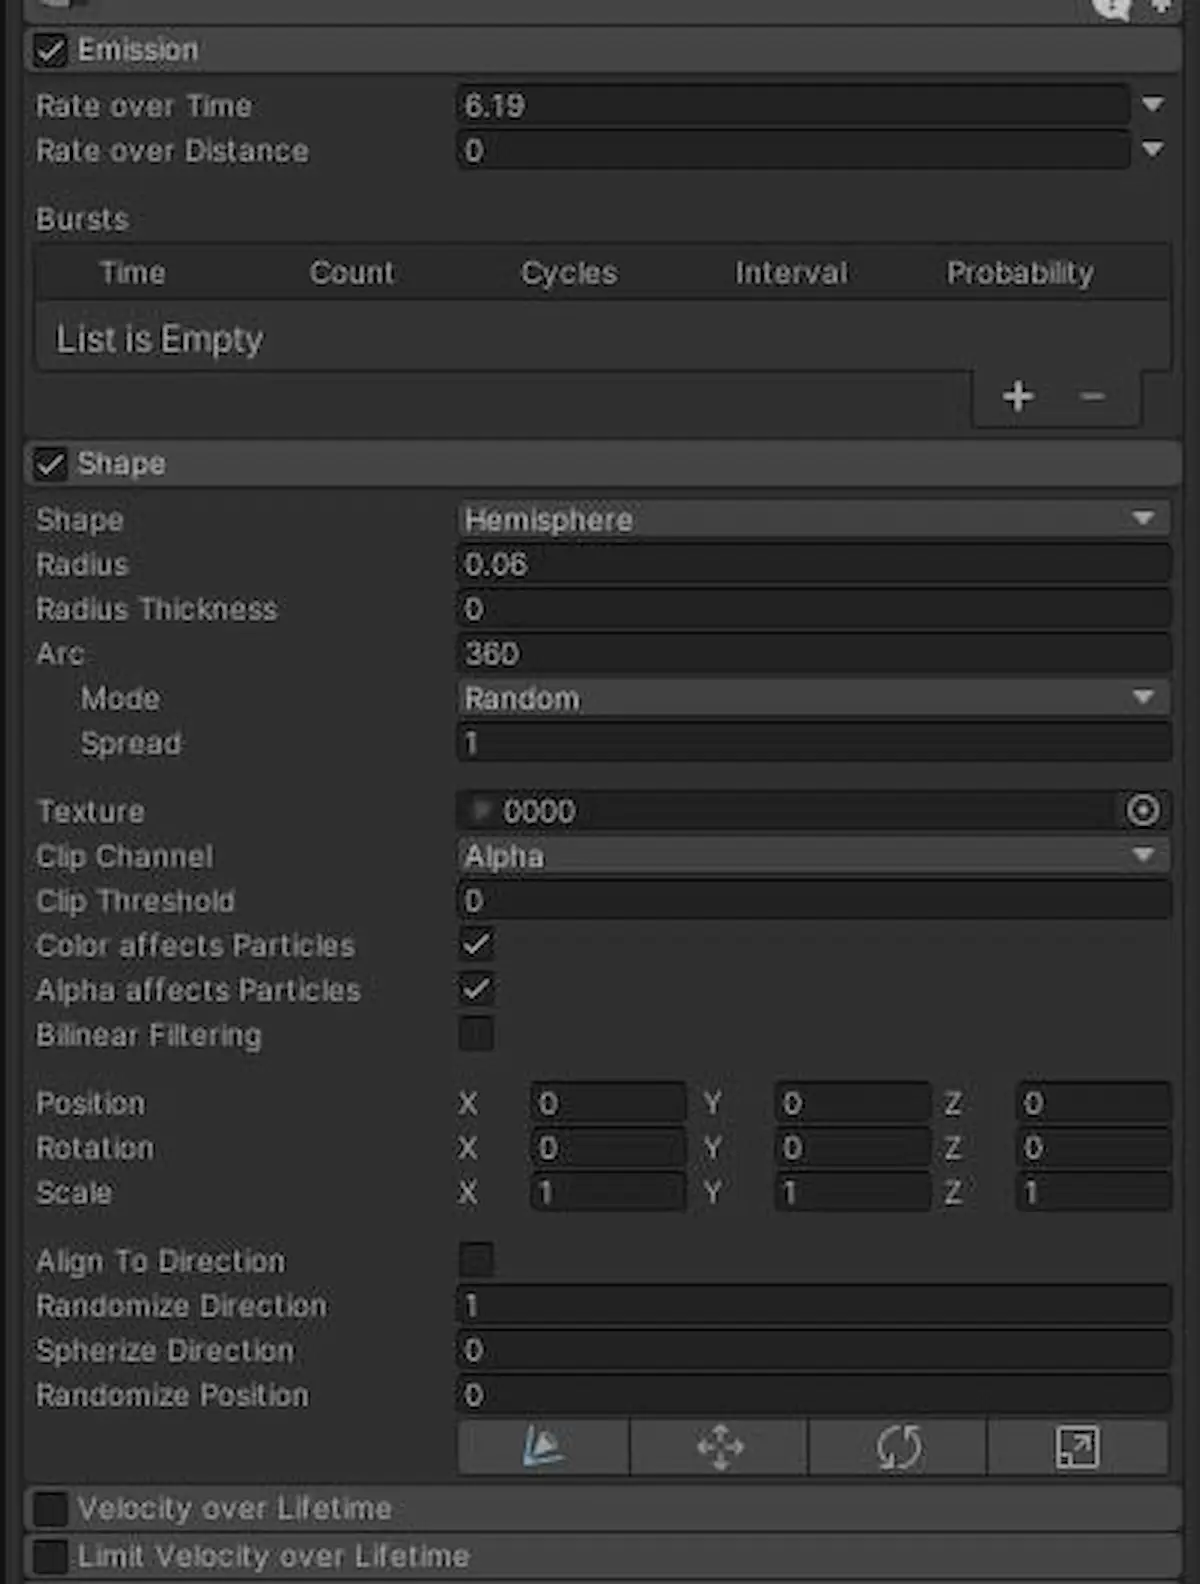
All these settings can be intimidating, but you can easily copy these settings one by one in your project to implement a fire effect. Next, we will go into all the different dropdowns that are enabled in this preset, starting with Emission and Shape.
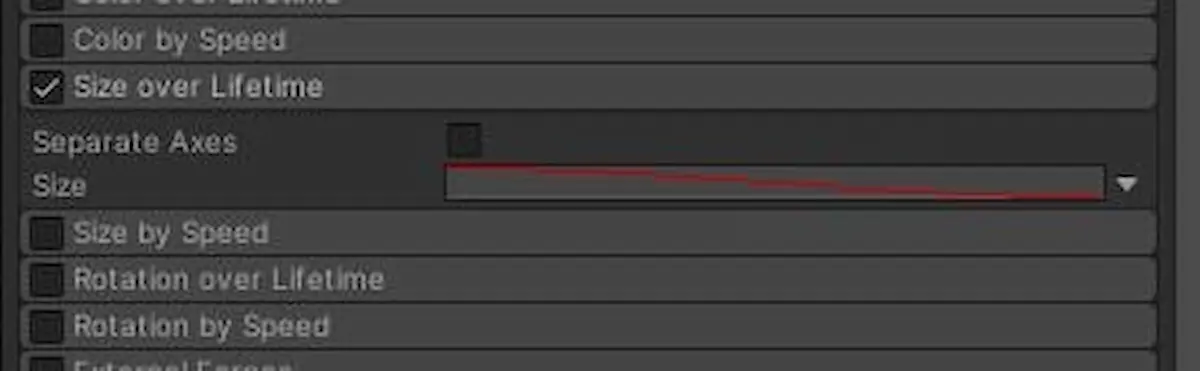
Next, make sure you select the correct Size over Lifetime setting. In the dropdown menu, select Curve. This setting will ensure that the particles decrease in size over their lifetime, mimicking the embers of a fire as they extinguish upwards.
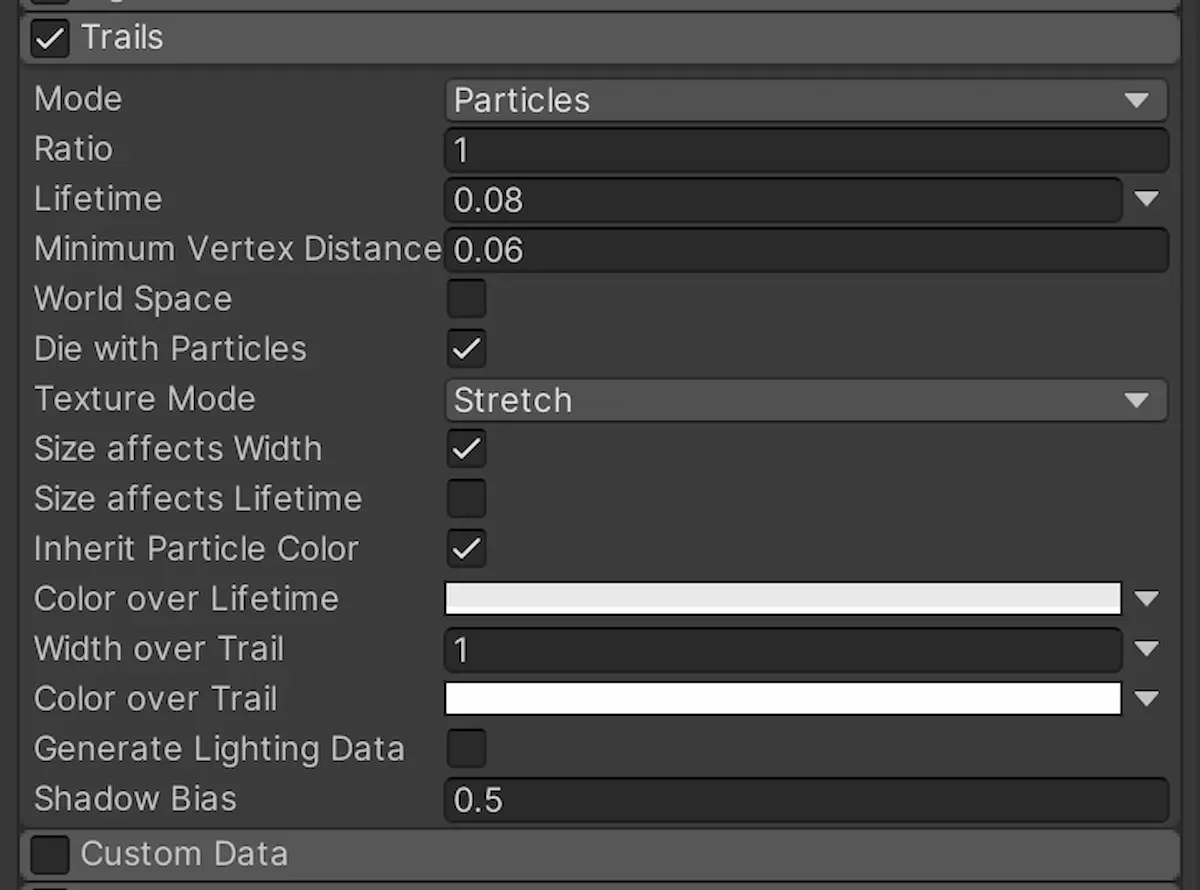
Further down in the menu, enable the Trails setting and use the settings below. The trails allow the particle to leave a trail as it moves upwards. In this case, the trail effect is very subtle, making the ember effect even more effective. You can notice a slight elongating effect as the particle disappears.
Before moving on, we must create a new material and shader. To create a new shader, first, create a new material by right-clicking in the project window, then with your mouse hovering over the material, right-click again and select Create > Shader Graph. We are using URP for our project so we chose the URP shader graph. We also want our material to be affected by light and emit a glow, therefore, we need to select the shader lit option.
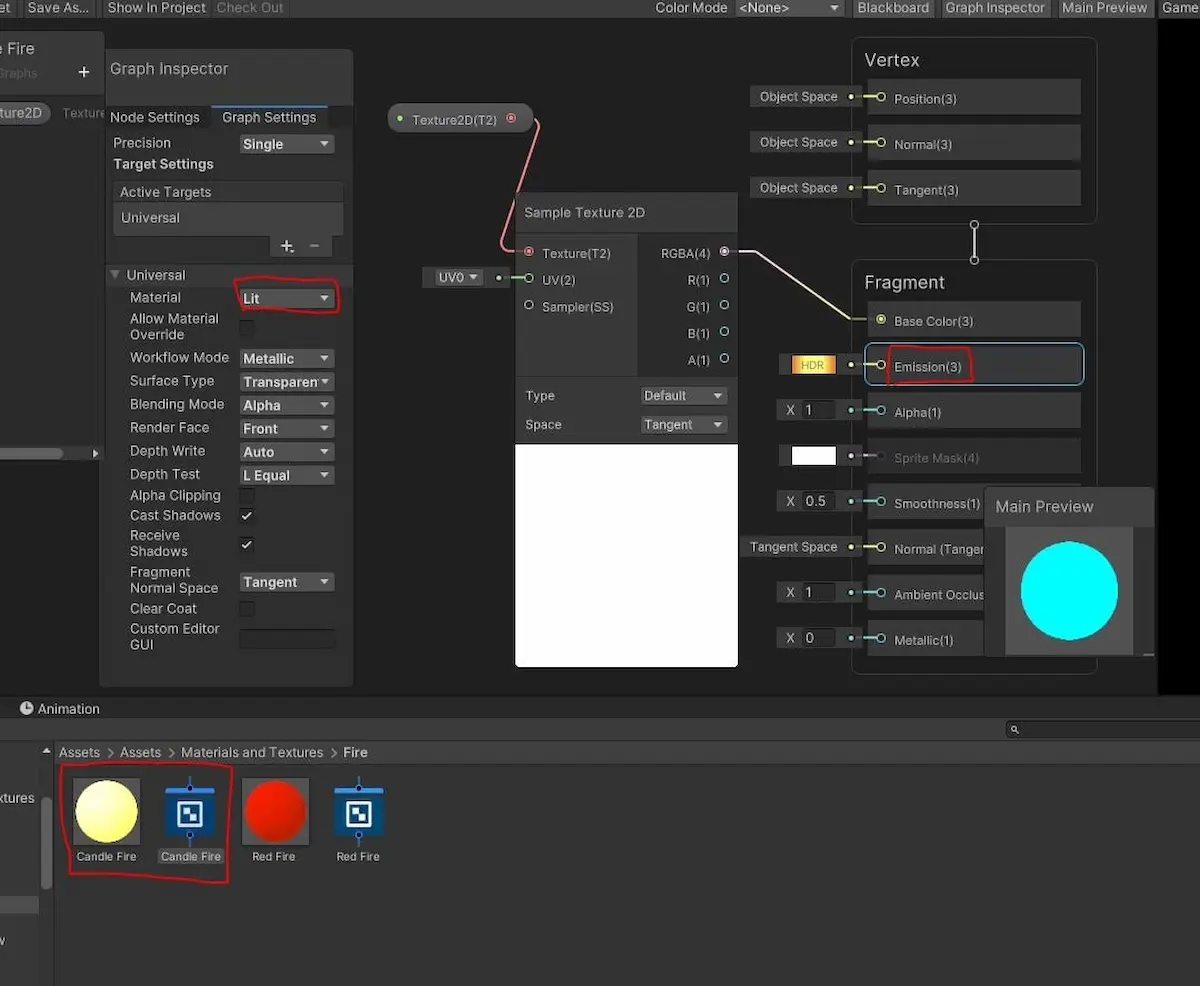
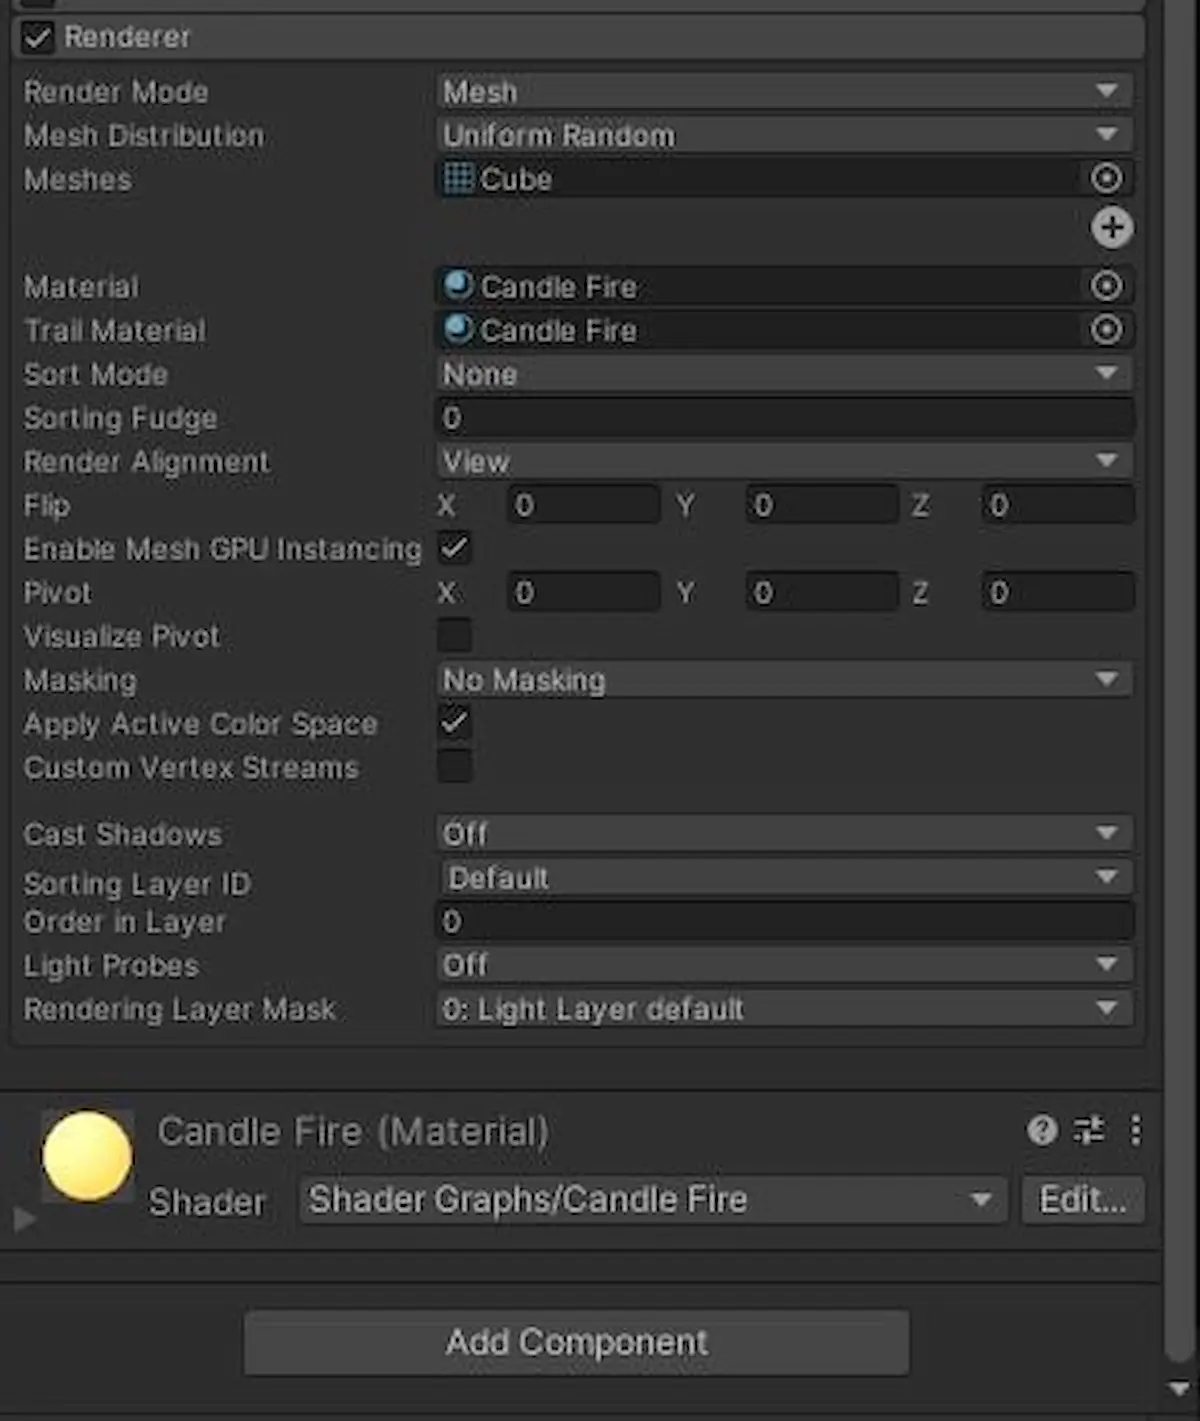
Back inside the particle system under Renderer, we want to set our Material and Trail Material parameter to the new material we just created. Now, our particle effect will emit a fire colour and glow. There are a few more steps to create the glowing effect visible in the game view, which involves creating a post-processing bloom in your scene. There are great tutorials online on setting that up, but we will dig deeper into that in a future newsletter.
The Result

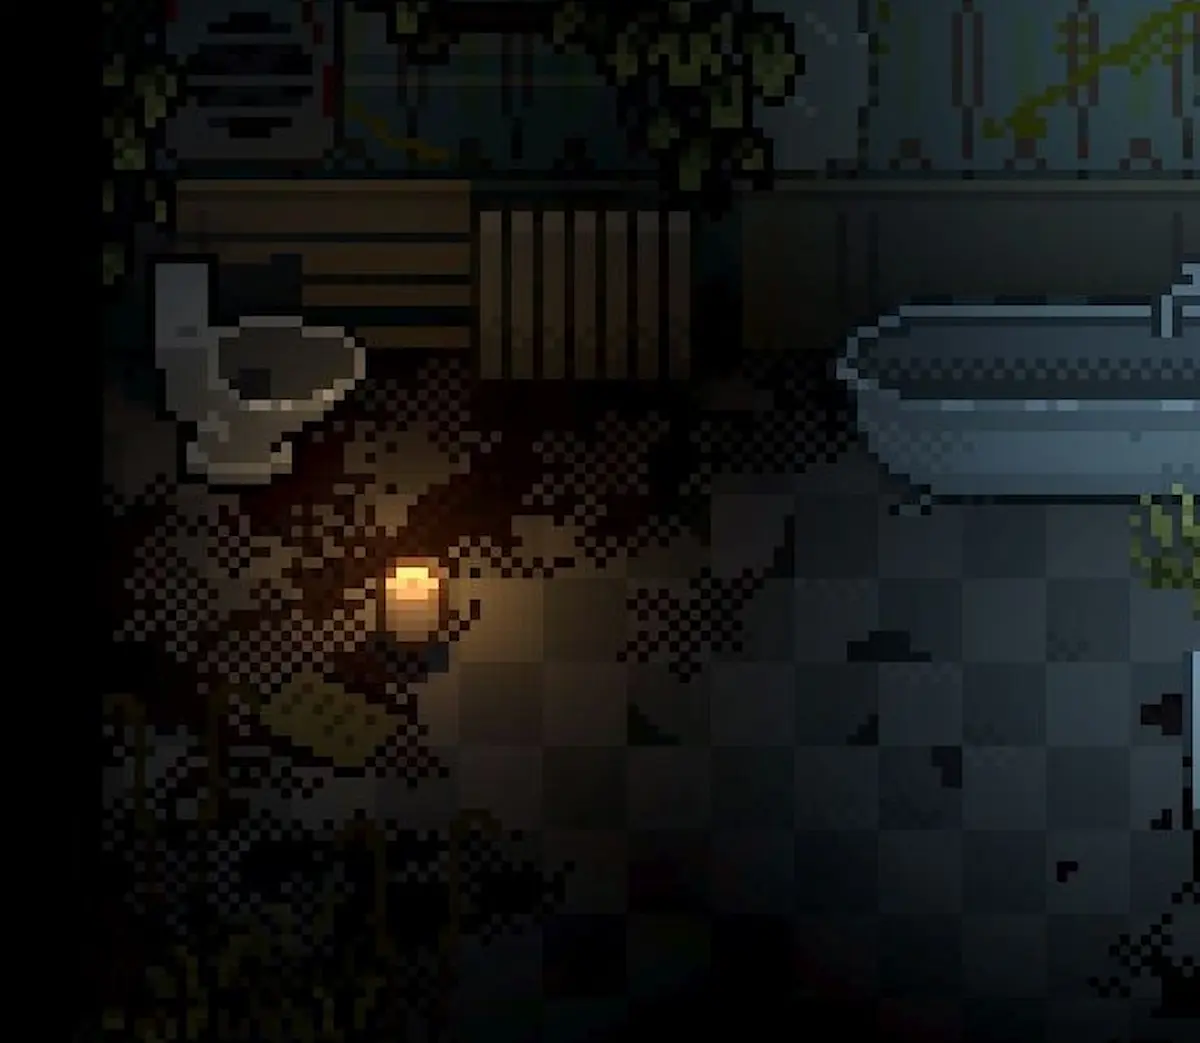
And there you have it, our cozy candle effect! Particles are a great way to add depth to your scene, and with our candle particles, it is easy to manipulate the parameters to create new effects, such as a toasty fireplace.